.png)
5:03 AM
Method Statement for Kerbstone Installation
1. TITLE
Method Statement for the Installation of Kerbstone.
2. SCOPE OF WORKS
2.1
General Description
·
The
scope and purpose of this method statement is to outline the general
requirements and precautionary measures which should be taken into
consideration during installation of kerbstone and to ensure that works are
according to the drawings, standards and project specification.
2.2 Plant
and Equipment
2.2.1
Trowel
2.2.2
Masons Rubber Hammer
2.2.3
Masonry power saw
2.2.4
Level bar
2.2.5
Mason’s line
2.2.6
Steel square
2.2.7
Brushes
2.2.8
Shovels
2.2.9
Powered mortar mixer
2.2.10
Kerbstone clamp
2.2.11
Skid stud loader
2.3
Materials
S.N
|
Material
|
Status
|
|
1
|
Kerbstones
|
reference transmittal
|
approved or rejected
|
2.4 Site
Planning and Preparation
2.4.1
Prior to
installation, all areas for kerb laying shall be properly marked by surveyor as
per approved drawings.
2.4.2
Proper planning
of execution as per area of installation shall be made.
2.4.3
All required materials
shall be placed near on site of installation with quantity as per site
requirements.
2.4.4
Material
transfer shall be through tower crane lifting to the nearest point from the
place of installation.
2.4.5
Horizontal
transfer of materials shall be made by using push cart.
2.5.1 Documentation
1. Ensure that all materials, sample, accessories and method of statement are approved prior to execution on site.
1. Ensure that all materials, sample, accessories and method of statement are approved prior to execution on site.
2. Prior
to execution of works, an execution clearance shall be obtained from MEP for
proper coordination regarding cut out.
2.5.2
Material
Specification:
All materials and accessories to be used shall
be as per material approval.
2.5.3
Installation
2.5.2.1
Surface of installation shall be properly marked by surveyor as per
approved drawings. Top Level of the kerb shall be 275 cm from slab level.
2.5.2.2
All marking shall be done by Surveyor as per the approved shop drawing
prior to any installation of kerbstone.
2.5.2.3
Kerb Stone shall be laid
spaced 6 mm on joints onto sand/cement (3:1) mortar bedding 25 mm thick with a
continues concrete backing support with dowel bars fixed by anchoring epoxy
resin. (see illustration below)
2.5.2.4
Joints shall be filled
with fluid sand cement mortar.
2.5.2.5 No pavement or
any materials shall be placed on the kerb until such backing is completely
dried.
2.5.2.6 Kerb shall be
properly cleaned after installation.
2.5.2.7 Kerbs shall have
3mm tolerance at each end of an element, to the designated lines and grades.
4:49 AM


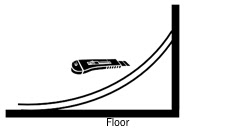
Figure - 5
Method Statement for Carpet Installation
1. TITLE
Method Statement for Carpet Installation
2. SCOPE OF WORKS
2.1
General Description
·
The
scope and purpose of this method statement is to outline the general
requirements and precautionary measures in Carpets Installation. This
should ensure that the works will be done with good quality as per the project
specification, standards and drawings.
2.2
Plant and Equipment
·
Cutter / Scissor
·
Scraper
·
Meter Tape
·
Straight Edge
·
Framing Square
·
Paint Roller
2.3
Materials
S.N
|
Material
|
Status
|
|
1
|
Approved Carpet model and type
|
reference submittal
|
approved or rejected
|
2
|
Accessories
|
||
2.4.1 Handling and Storage
·
The materials delivered at site shall be
carefully off-loaded as per manufacturer’s instructions by deploying
necessary/adequate manpower in such a way that no damage is caused.
·
Materials that
cannot be offloaded from delivery vehicles and transported to the working areas
by hand may be handled by suitable equipment such as trolleys pallet truck and
furniture skate.
·
All the
materials shall be handled and stored properly at allocated location at site.
·
It shall be
ensured that the delivered materials are in compliance with the approved
material submittal.
·
All minor
components supplied shall be identified and sorted properly.
·
The materials
shall be stored carefully to avoid any damages due to the construction
activities in a place as per manufacturer’s recommendation.
·
Any
discrepancies, damages etc. found shall be notified and reported to the
Engineers for further action & notification shall be sent to supplier.
·
Material found
not suitable for site use shall be removed from site immediately and replaced
with new suitable material.
2.4.2 Surface
or Substrate Preparation
·
Comply with
carpet tiles manufacturer’s recommendation for preparing substrate indicated to
receive Carpet tiles.
·
After casting of
required thickness of screed and as per the design requirements, surface to be
smooth, straight to finish and suitable to execute the work.
·
Repair all
cracks, holes and depression in substrates.
·
Remove all
substances incompatible with the flooring adhesive and that contain soap,
grease/oil, wax and silicone as per manufacturer’s recommendation.
·
Broom and vacuum
clean substrate to be covered immediately before product installation. After
cleaning examine substrate for moisture, alkalinity salts, carbonation or dust.
Do not proceed with installation until satisfactory conditions have been
corrected.
2.4.2 Installation
Procedure
·
Installation
procedure will be as per manufacturer’s recommendation.
·
Prior to start
of installation activities, refer to the approved shop drawings related to the
installation area & ensure that carpet flooring shall be as per approved
material submittal. MEP clearance for any utilities shall be secured prior to
start the succeeding works. Execution Clearance shall be signed and approved by
all parties prior to installation of carpet to ensure no other work balance of
the screed.
·
Ensure that
approved shop drawing related to the installation area & materials are as
per approved material submittal.
·
Begin the layout by carefully marking working lines
on the floor surface to act as the starting position and guide for your carpet
tile installation. First, determine that your room is as square as possible:
Take measurements to determine the center of the room and snap a horizontal and
a vertical chalk line that intersect at the center of the room. (see Figure-1)

·
The adhesive must be applied in a full spread rate
as per manufacturer’s recommendation.
·
Allow the adhesive to dry to a clear tacky state.
·
Once the adhesive properly sets up place the first
four tiles carefully along the intersection of your first quadrant, stair
stepping each tile as you go (see Fig. 2).

Figure – 2
·
Once the adhesive properly sets up place the first
four tiles carefully along the intersection of your first quadrant, stair
stepping each tile as you go (see Fig. 2).
·
This pyramid technique keeps the entire layout
square and in reference to the chalk lines. Slide each tile into position from
the side to prevent trapping yarn. Trapped yarn will affect the appearance of
the installation and cause alignment problems. Do not compress tile when
installing, this will cause peaking, requiring reinstallation.
·
Use a framing square / square angle to randomly
check squareness of installation (see Fig. 3).

Figure – 3
·
Carpet tiles cut well from the
back. Tiles should be cut so that the trimmed edge will always be placed
against the wall. After Installation, all areas must be rolled with a seam
roller to blend and enhance seams.
NOTE: Compressing the tie at the wall
can cause edge peaking.
|
Tile
|
|
Straightedge
|
|
|
|
Floor
|
Figure - 4
Figure - 5
·
Figure 4. One method of trimming the tiles is to
measure the distance between the wall and the closest installed full tile.
Utilizing the measurement, mark the back of the tile to be trimmed with a
pencil or pen and a straight edge or other straight object. Using a sharp
blade, score the tile along the marked line and bend or break the tile. Sever
the tile along the line using a sharp blade.
·
When trimming around doors and columns, rigid
“utility type” blades often work better than more flexible slotted blades.
Carpet Tiles are easiest cut by scoring the back with a rigid blade, and then
bending or breaking the tile. The tile can then be severed with a sharp blade.
·
Figure 5. If preferred, Carpet Tiles can be trimmed
by coving the tile up the wall, and trimming free hand. Wall trimmer work best
for this type of trimming. Rigid Hook or straight blades also work well.
·
Chair pads are recommended under office chairs with
roller casters to preserve appearance retention, avoid premature and
accelerated wear.
·
After completion of each work the area shall be kept
clean and closed to avoid dirt on the carpet.
·
After the installation until being taken to use the
carpets should be protected against damage and soiling from traffic and
subsequent craftsmen. The extent and type of covering will depend on the type
of load, traffic intensity and weather a dry or wet load can be expected.
·
No furniture or equipment should be placed on the
carpet before the floor adhesive is completely dry and tempered which can take
up to 24 hrs.
·
Working areas will be kept clean by disposing the
waste materials at the designated work areas.
Subscribe to:
Comments (Atom)
Popular Posts
-
 1. TITLE Method Statement for repairing of tie rod hole. 2. SCOPE OF WORKS 2.1 General Description · The scope an...
 -
 1. TITLE Method Statement for the Backfiling Works. 2. SCOPE OF WORKS 2.1 General Description · The scope and pur...
 -
1. TITLE Method Statement for the Concreting Works of Raft Foundation . 2. SCOPE OF WORKS 2.1 General Description · ...
-
1. TITLE Method Statement for the Installation of Kerbstone. 2. SCOPE OF WORKS 2.1 General Description · The scope ...
-
TABLE OF CONTENTS 1.0 Objectives 2.0 Scope 3.0 Reference 4.0 Abbreviations 5.0 Health and Safety 6.0 Equipments 7.0 Responsibilitie...
-
 1. TITLE Method Statement for Carpet Installation 2. SCOPE OF WORKS 2.1 General Description · The scope and purpo...
 -
 1. TITLE Method Statement for Concrete Crack Repair 2. SCOPE OF WORKS 2.1 General Description · The scope and pur...
 -
1. TITLE Method Statement for Installation of Wall and Floor Tiles 2. SCOPE OF WORKS 2.1 General Description ...
-
1. TITLE Method Statement for Plastering Works. 2. SCOPE OF WORKS 2.1 General Description The scope and purpose of this me...
-
1. TITLE Method Statement for Painting Works of wall and ceiling 2. SCOPE OF WORKS 2.1 General Description The scope and pur...